

Introduction to Vanilla Nut Granola
This vanilla nut granola recipe is the suitable snack concept—manner greater exciting than cereal but just as smooth to seize inside the morning. If you’ve never had selfmade granola, you’re in for a treat! It’s the kind of element that makes your kitchen smell like a bakery and leaves you feeling like a pro, even in case you’re simply blending substances in a bowl.
This recipe gives you a candy, nutty crunch with simply the proper trace of vanilla. It feels fancy but doesn’t come with the charge tag of keep-sold mixes. Sprinkle it on yogurt, pour it over milk, or revel in it straight out of the jar when you’re craving some thing snacky. For greater versatile meal thoughts, check out our Hmong Cabbage and Chicken Recipe or this Simple Chicken Thigh Recipe for Meal Prep to keep your weekly menu thrilling and stress-free.
Whether you’re new to creating granola or a longtime fan, this vanilla nut granola recipe is brief, smooth, and severely enjoyable. Let’s dive into the information so that you can whip up a batch that will disappear faster than you suspect.
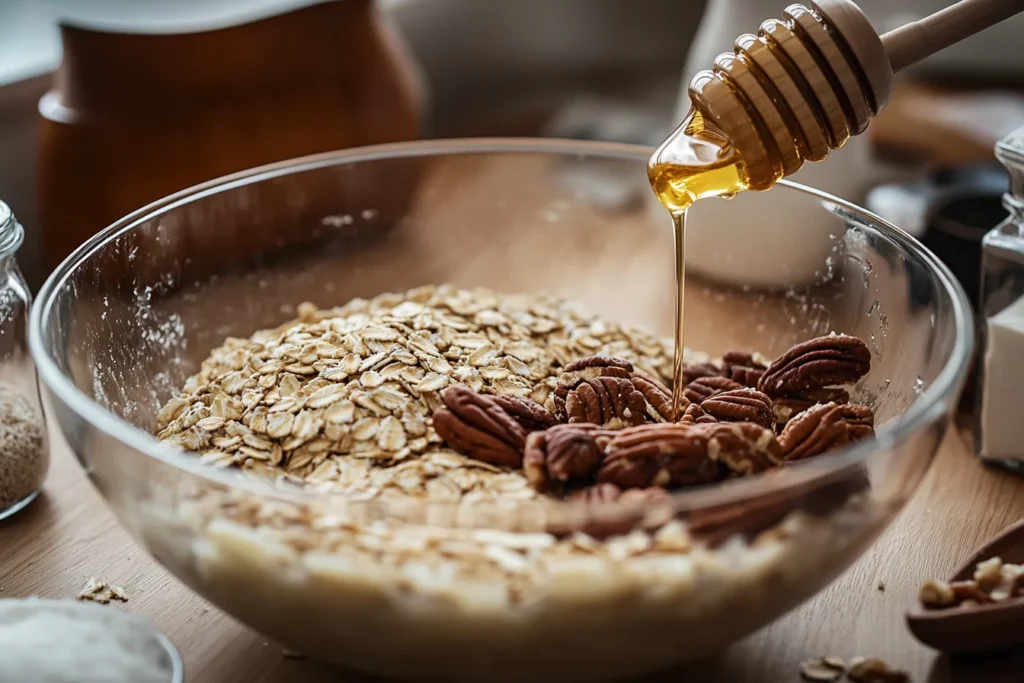
Table of Contents
Ingredients for the Best Vanilla Nut Granola
When it comes to making vanilla nut granola, the magic lies in a handful of simple, pantry-friendly ingredients. Here’s what you’ll need to create a batch that’s perfectly crispy, sweet, and nutty.
Dry Ingredients
Rolled Oats: The star of the show. Go for old-fashioned oats—they toast up beautifully and give that classic granola texture.
Nuts: Almonds, pecans, walnuts—pick your favorite or mix them up! Chop them roughly for a good balance of crunch.
Seeds: Optional, but sunflower seeds or chia seeds add a nice texture and a little extra nutrition.
Coconut Flakes: Totally optional, but if you’re a coconut fan, they add a slightly tropical vibe.
Wet Ingredients
Honey or Maple Syrup: This is what makes the granola sweet and helps it stick together. Pick your favorite or use a combo for a deeper flavor.
Coconut Oil or Butter: Adds richness and helps everything crisp up in the oven. Coconut oil gives a hint of coconut flavor, while butter feels more traditional.
Vanilla Extract: The MVP ingredient! Use good-quality vanilla for the best flavor—it’s worth it.
Extras (Optional)
Cinnamon: Just a pinch for warmth.
Salt: Trust me, a tiny bit of salt balances the sweetness and makes the flavors pop.
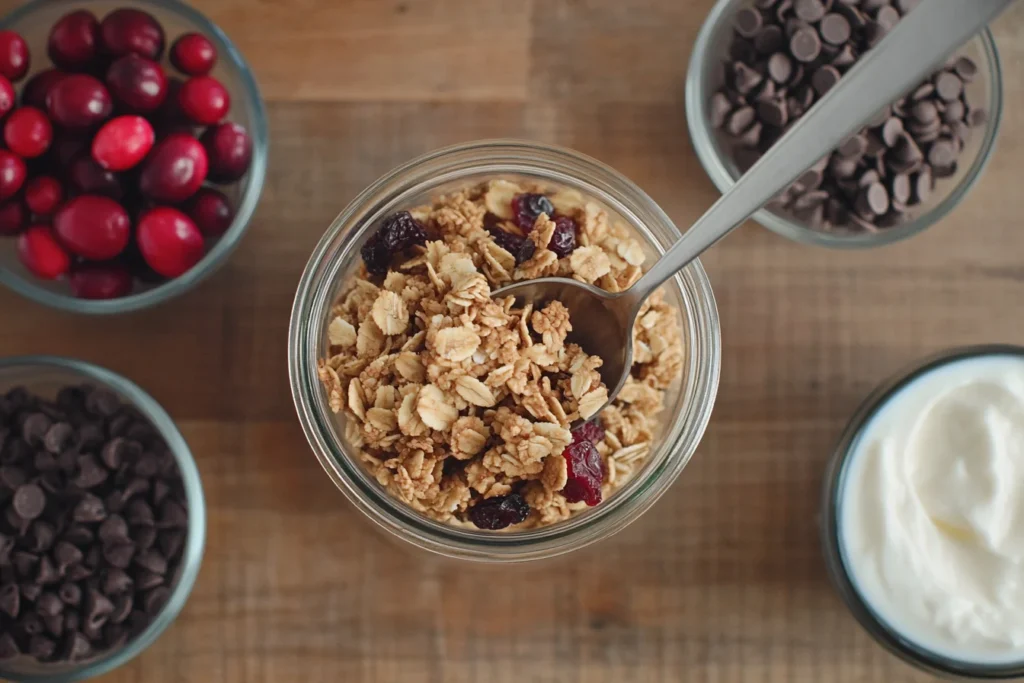
Dried Fruit: Add raisins, cranberries, or chopped dates after baking for a chewy twist.
Chocolate Chips: For the sweet tooth crowd—wait until the granola cools before tossing them in, so they don’t melt.
Why These Ingredients Work
The oats provide the hearty base, the nuts bring crunch, and the sweeteners and oil tie it all together. Vanilla extract and optional spices make the flavor shine, while add-ins like fruit or chocolate let you customize it however you like.
Keep these staples stocked, and you’ll always be just minutes away from the best granola you’ve ever tasted.
Equipment You’ll Need for Vanilla Nut Granola
Good news: you don’t need any fancy gadgets to make vanilla nut granola! Most of this stuff is already sitting in your kitchen. Here’s a quick rundown of what you’ll need:
- Mixing Bowl
You’ll need a large mixing bowl to combine all your ingredients. Make sure it’s big enough to let you stir without everything flying out—because oats can be messy! - Measuring Cups and Spoons
Grab your trusty measuring set. You’ll use them for oats, nuts, sweeteners, and that all-important vanilla extract. Precision helps keep your flavors balanced. - Baking Sheet
A rimmed baking sheet is perfect for spreading out the granola evenly. The rim keeps everything in place while it toasts up in the oven. - Parchment Paper or Silicone Baking Mat
Line your baking sheet with parchment paper or a silicone mat. It continues the granola from sticking and makes cleanup a breeze. Nobody wants to scrape honey off a pan! - Spatula or Wooden Spoon
Use this to mix your ingredients and spread the granola out on the baking sheet. A flat spatula works best when it’s time to stir halfway through baking. - Airtight Container
Once your granola is baked and cooled, store it in an airtight container to keep it fresh and crunchy. Mason jars or reusable food storage containers work great.
Optional Extras:
Whisk: If you want to get your wet ingredients super smooth, a small whisk comes in handy.
Knife and Cutting Board: For chopping your nuts or dried fruit.
Why These Tools Matter
This setup is simple but makes the process smooth from start to finish. With the right tools, your granola comes out evenly baked, easy to clean up, and ready to store for days of snacking.
Step-by-Step Guide to Making Vanilla Nut Granola
Making vanilla nut granola at home is great smooth, and the effects are so worth it. Follow these steps to whip up a batch of golden, crunchy granola that tastes tremendous.
Step 1: Preheat the Oven
Set your oven to 325°F (160°C). This low-and-gradual baking temperature is ideal for purchasing the granola toasty with out burning.
Step 2: Line Your Baking Sheet
Place a sheet of parchment paper or a silicone baking mat on your rimmed baking sheet. This keeps the granola from sticking and makes cleanup a breeze.
Step three: Mix the Dry Ingredients
In a huge mixing bowl, combine:
3 cups of rolled oats
1 cup of chopped nuts (like almonds, pecans, or walnuts)
¼ cup of seeds (sunflower or chia, if you like)
A pinch of salt
Optional: 1 teaspoon of cinnamon for heat
Stir everything collectively so it’s lightly combined.
Step 4: Prepare the Wet Ingredients
In a smaller bowl or microwave-secure dish, mix:
⅓ cup of honey or maple syrup
¼ cup of melted coconut oil or butter
2 teaspoons of vanilla extract
Heat the combination lightly within the microwave or at the stovetop if wanted, simply until the coconut oil melts and the whole lot blends smoothly.
Step five: Combine Wet and Dry Ingredients
Pour the wet substances over the dry mixture. Use a spatula or wooden spoon to stir until every oat and nut is coated. Don’t rush this step ensures your granola gets lightly flavored and golden.
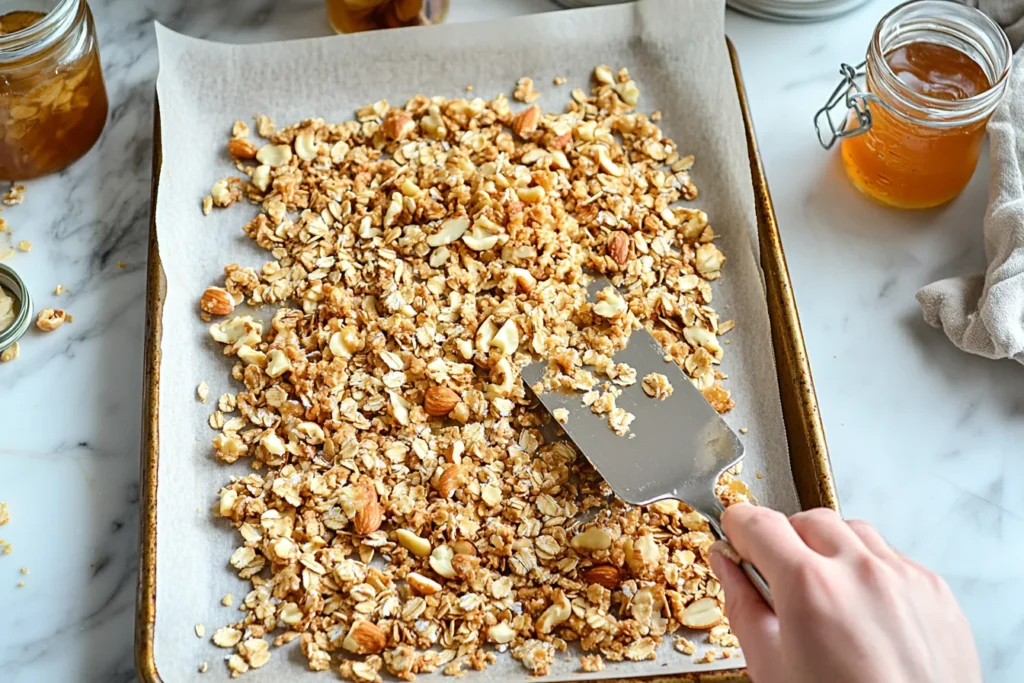
Step 6: Spread on the Baking Sheet
Dump the mixture onto your prepared baking sheet. Spread it out in a fair layer, urgent it down lightly together with your spatula. This allows create the ones delicious clusters!
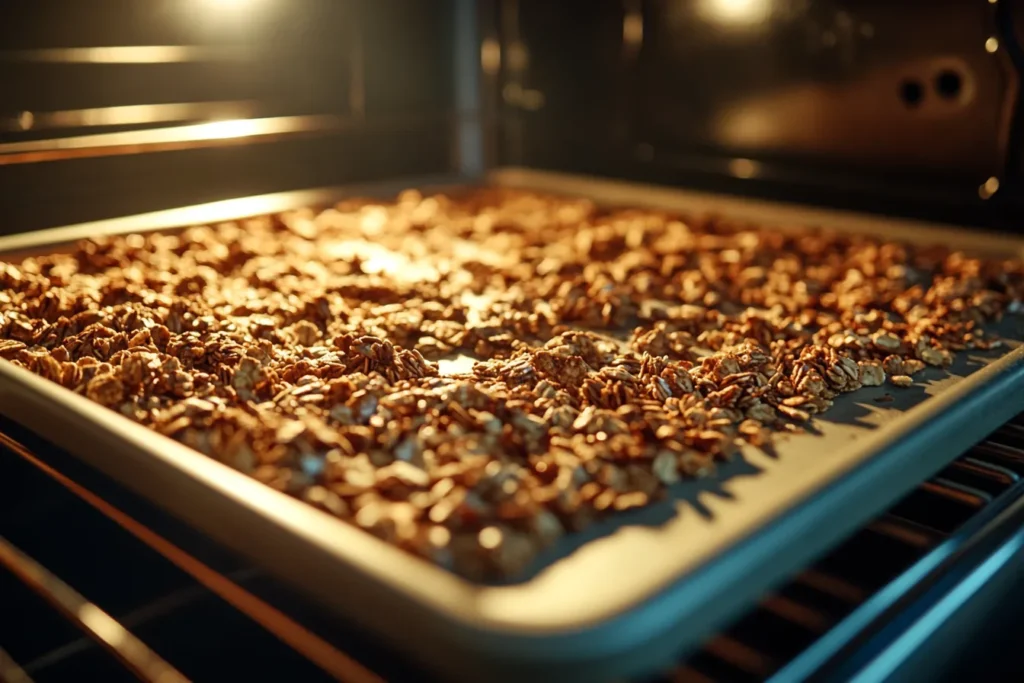
Step 7: Bake the Granola
Pop the sheet into the oven and bake for 20–25 minutes.
Pro Tip: Stir the granola halfway thru to ensure it browns flippantly. If you like big clusters, only stir gently or pass this step.
Step 8: Cool Completely
When the granola is golden and smells incredible, take it out of the oven. Let it cool at the baking sheet with out touching it—it crisps up because it cools.
Step nine: Add Extras (Optional)
Once cooled, stir in dried fruit (like cranberries or raisins) or chocolate chips if preferred. Don’t add these before baking, or they’ll burn or melt.
Step 10: Store and Enjoy
Transfer the granola to an airtight container, like a mason jar or meals storage container. It’ll live clean and crunchy for up to 2 weeks if it lasts that long!
Final Thoughts
That’s it! In just a few steps, you’ve made a batch of selfmade vanilla nut granola that’s ideal for snacking, topping yogurt, or even gifting to pals. Enjoy the candy, nutty crunch on every occasion.
Tips and Tricks for the Best Vanilla Nut Granola
Homemade granola is easy to make, but a few simple tricks can take it from good to amazing. Whether you’re a first-timer or a granola pro, these tips will help you nail that perfect crunch and flavor every time.
- Use Old-Fashioned Rolled Oats
Quick oats are too fine and can make your granola clumpy or powdery. Stick with old-fashioned rolled oats for that classic chewy-yet-crispy texture. - Don’t Skip the Salt
A pinch of salt might seem unnecessary in something sweet, but it’s a game-changer. It balances the flavors and makes the sweetness pop. - Press for Clusters
If you love big, crunchy clusters, press the granola into the baking sheet with your spatula before baking. Stir lightly or skip stirring altogether to keep the clusters intact. - Low and Slow Wins the Race
Granola needs time to toast evenly. Bake at 325°F (160°C) for a golden-brown finish without the risk of burning. It might take a little patience, but the results are worth it. - Let It Cool Completely
This is crucial! The granola will feel soft when it’s hot but crisps up as it cools. Don’t stir it until it’s fully cooled if you’re aiming for those satisfying clusters. - Customize Your Mix-Ins
Add dried fruit, chocolate chips, or even coconut flakes after baking. These ingredients can burn easily, so save them for the final step. - Experiment with Sweeteners
Honey and maple syrup are classics, but you can try agave syrup or brown sugar for a slightly different flavor. Want less sweetness? Reduce the amount by a tablespoon or two—it’s still delicious! - Watch the Edges
The edges of your granola bake faster than the center. Keep an eye on them during the last few minutes of baking to avoid any bitter, overdone bits. - Go Nut Crazy (or Not)
Chop your nuts to the size you like—bigger chunks for extra crunch, smaller pieces for a smoother texture. And if you’re not a nut fan, seeds like pumpkin or sunflower work great too. - Store It Right
Use an airtight container to keep your granola fresh and crunchy. If you live in a humid climate, toss in a silica gel packet (like the ones you find in store-bought snacks).
Bonus Tip: Double the Recipe
Granola disappears fast! Make a double batch and store some for later—it’s a lifesaver when you need a quick breakfast or snack.
Serving Suggestions for Vanilla Nut Granola
Vanilla nut granola is a jack-of-all-trades when it comes to meals and snacks. Here are some fun, easy ways to enjoy it:
- Classic Breakfast Bowl
Pour your granola into a bowl, add milk (regular, almond, oat—you do you), and dig in! It’s like cereal but way more satisfying. - Yogurt Parfait
Layer granola with creamy yogurt and fresh fruit like berries or bananas. It’s simple, fancy-looking, and perfect for breakfast or a snack. - Smoothie Topping
Blend up your favorite smoothie and sprinkle granola on top for a crunchy contrast. Bonus: it adds a little extra fiber and protein! - Grab-and-Go Snack
Keep a jar of granola handy for munching by the handful. It’s great for road trips, desk snacks, or anytime hunger strikes. - Dessert Game-Changer
Sprinkle granola over ice cream or pudding for a sweet, crunchy topping. Add a drizzle of caramel or chocolate sauce to make it extra indulgent. - Baked Treat Add-In
Mix granola into cookie or muffin batter for a nutty, chewy twist.
FAQs About Vanilla Nut Granola
1. What are the ingredients in Trader Joe’s Vanilla Almond Granola?
Trader Joe’s Vanilla Almond Granola contains rolled oats, milled cane sugar, canola oil, rice flour, almonds, cornstarch, honey, natural flavors, salt, and barley malt syrup.
2. What ingredient makes granola stick together?
Sticky ingredients like honey, maple syrup, or brown sugar act as binders, helping granola clump and form clusters.
3. Why are homemade granolas not crunchy?
Homemade granola may not be crunchy if baked at too high a temperature, causing the outer ingredients to burn before drying out and crisping evenly.
4. Why is granola so high in sugar?
Granola is often sweetened with added sugars like honey, maple syrup, or cane sugar to improve flavor and create a sweet, appealing taste.
Conclusion
Vanilla nut granola is the perfect aggregate of simple components, impossible to resist taste, and crunchy texture. Whether you’re sprinkling it over yogurt, taking part in it through the handful, or using it as a breakfast staple, it’s a versatile treat that fits into any part of your day.
Making it at home is short, customizable, and helps you to control the sweetness, crunch, and mix-ins to suit your flavor. Plus, it fills your kitchen with the warm, comfy aroma of vanilla and toasted nuts what’s now not to love?
With the tips and hints we’ve shared, you’ll be geared up to make granola that’s no longer just suitable but downright addictive. So grab your oats, nuts, and a dash of vanilla, and whip up a batch of this golden goodness. Your breakfasts, snacks, and desserts will in no way be the identical.